A professional vocal mix is crucial for creating high-quality music. Whether you're an experienced engineer or a beginner, getting the vocals to fit well in a mix can be tough. If you want to learn how to achieve that polished, radio-ready sound, this guide is for you.
We’ll go through 8 vocal mixing techniques that will enhance your tracks. From EQ and compression to reverb and delay, we’ll cover everything you need to know to make your vocal tracks stand out. Let’s get started!
TABLE OF CONTENTS
8 Tips For Better Vocal Mixes
Here are 8 tips to help you create amazing vocal mixes. Each tip is important, so make sure to follow all of them! These techniques focus on lead vocals and can be applied to any singing style. Let’s start with how to record vocals.
1. Get A Great Recording
The quality of your original vocal recording directly affects the final result. Good vocal tracks create a strong base for mixing and can save you time and effort later on. In contrast, a poorly recorded track can make it hard to get a clear sound and lead to a amateur sounding mix.
If a track is recorded badly, you might deal with background noise, distortion, or uneven levels. These issues can complicate isolating or improving the vocals. You will have to look to noise reduction plugins and other tools to enhance the recording. Sometimes these tools are successful and other times they are not.
Before you start recording, it's important to choose the right microphone for vocals and set proper gain levels. Take the time to get your recording right—your mix will benefit in the end!
Related Article: The Top 5 Best Microphones for Recording Vocals In 2025
2. Remove Unwanted Mouth Clicks and Noise
Getting rid of mouth clicks, controlling breathing sounds, and reducing background noise are important when mixing vocals. These factors impact the overall quality and clarity of the vocal sound, making a big difference in the final mix. To achieve studio-quality vocals, these issues need to be addressed first.
Mouth Clicks
Mouth clicks are the audible pops or clicks that happen when a singer's mouth is too close to the microphone or when their lips touch while singing. These clicks can be distracting and pull the listener's focus away from the song. It's crucial to remove these mouth clicks during editing using tools like Izotope RX 10 Mouth De-click.
Breath Control
Controlling breath sounds in vocals is also vital for mixing. When recording, breathing noises can be noticeable and distracting, especially in softer parts of the song. Using breath control techniques while recording can help reduce these sounds, but they can also be lessened in the mix with methods like volume automation or gating. Consider using Izotope RX 10 Breath Control to manage breath noises effectively.
Noise Reduction
Reducing background noise is another key part of mixing vocals. When recording in a studio or live setting, microphones may pick up unwanted background sounds. These noises can be reduced or removed during mixing with tools like noise gates or de-noise plugins. Our favorite plugin for noise reduction is Waves Clarity Vx Pro.
Pro Tip: "Use a pop filter to reduce sibilance, plosives, and mouth noise while recording. This simple tool is essential for keeping your vocal recordings clear."
3. Reduce Sibilance in Vocals With A De-esser Tool
Sibilance in vocals refers to the hissing or harsh “s” and “sh” sounds that can happen during recording. While these sounds are normal in speech and singing, too much sibilance can be distracting for listeners. This is where a de-esser tool is useful.
A de-esser is an important plugin used in vocal mixing to reduce sibilance. It detects specific frequencies—usually around 7 kHz—where sibilance occurs and lowers those frequencies. This helps to make the vocals sound smoother and more polished.
How to Use a De-esser
To use a de-esser effectively, first find the parts of the vocal track with the most sibilance. Listen for any hissing or harsh “s” and “sh” sounds. Once you identify these areas, apply the de-esser to the track and adjust the settings, focusing on frequency detection.
Understanding De-esser Controls
Most de-essers have controls for frequency detection, threshold control, and gain reduction:
- Frequency Detection: Set the specific frequencies where sibilance happens.
- Threshold Control: Decide when the de-esser will start reducing sibilance.
- Gain Reduction: Determine how much reduction will be applied.
Tips for Effective De-essing
It’s important to use a light touch with a de-esser, as too much reduction can create an unnatural lisp sound. Aim for subtle adjustments that smooth out sibilance without changing how the voice sounds.
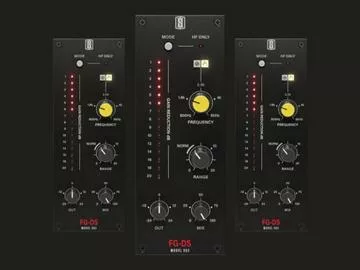
If you prefer using stock plugins for vocal mixing, many DAWs come with built-in de-essers that work well. However, if you're looking for a high-quality option, check out our favorite de-esser plugin: the Slate Digital FG-DS.
4. Pitch Correction

Pitch correction in vocal mixing is important because it helps the vocals match the song's key and other instruments. If a singer is slightly off-pitch, it can clash with the rest of the song, making the vocals sound out of tune. This is where fixing pitch issues becomes essential.
Vocal tuning software like Antares Autotune can analyze a vocal recording and automatically adjust the pitch, leading to better vocal quality that fits well with the music. By using these automatic tools, mix engineers can create a more polished and professional-sounding vocal performance.
However, it's crucial to use pitch correction wisely. Overdoing it can make vocals sound unnatural or robotic. It’s important for mix engineers to use pitch correction judiciously and to make sure that the final result sounds natural and musical.
Check out the best manual pitch correction software: Melodyne 5
5. Shape the Vocal Tone with Equalization
Equalization, or EQ, is a key tool in mixing that helps you adjust the sound balance of instruments. Good vocal EQ techniques involve changing the levels of certain frequencies in the vocal sound, allowing you to boost or reduce specific areas for a better overall tone.
To shape the vocal tone with EQ, start by identifying which frequency ranges need adjustment. This can vary based on the singer's voice and music style, but generally, focus on low frequencies (body), mid frequencies (presence), and high frequencies (clarity).
Here are 3 tips for vocal equalization:
- Use a high-pass filter to eliminate any low-end rumble or boominess, typically between 100-200 Hz. This will create a cleaner and clearer sound.
- Adjust mid frequencies by boosting or cutting them to change the presence in the vocal sound. The range of 1 kHz to 5 kHz contains most important midrange information, so look for any troublesome frequencies in this area to find what works best.
- Tweak high frequencies to add brightness or airiness to the vocals. Boosting frequencies above 5 kHz can give shine to the vocals, while cutting in this range can help reduce harshness or sibilance.
When using EQ, make small adjustments across the frequency spectrum and avoid going overboard. Big changes can distort the natural quality of the voice, leading to an unnatural or unbalanced sound. Instead, aim for minor tweaks and listen closely to how each change impacts the overall mix.
For more tips, check out this EQ cheat sheet that outlines best practices for eqing vocals.
6. Control Vocal Dynamics With Compression And Automation
Controlling vocal dynamics means managing the changes in volume and intensity during a vocal performance. These changes are crucial for conveying emotions and ensuring clear vocals. However, they can make audio mixing challenging. That's where compression and level automation come in.
Compression
Compression is a key tool for reducing the dynamic range in a vocal performance. It automatically lowers the volume of the loudest parts while raising the quietest sections. This helps keep the vocal performance consistent and prevents it from getting lost in the mix.
Level Automation

Level automation involves adjusting the volume levels of individual tracks or sections to create a more balanced overall sound. When mixing vocals, level automation helps smooth out any volume differences, especially in parts where the vocals are very loud or soft, like during a chorus or bridge.
To effectively use compression and level automation for vocal dynamics, start by identifying which parts need adjustment. Listen to the track and note any areas where the vocals are too loud or too quiet. After pinpointing these sections, use compression to even out the levels and apply level automation if necessary.
For a detailed guide on using compression on vocals, check out this article: The 4 Steps To Properly Applying Compression On Vocals
7. Use Spatial Effects Wisely
Spatial effects for vocals, like reverb and delay, can enhance a vocal performance by adding depth. However, choosing the right effects can be tricky. Using the wrong effect or setting might lead to a muddy or fake sound. Here are some tips for using spatial effects when mixing vocals:
- Pick the Right Effect: The type of effect you use should match the music style and the sound you want. Reverb can give a sense of space to a vocal, while delay can add movement and rhythm. Try different effects to see what fits best for your track. NOTE: It’s common to use both reverb and delay together on vocal tracks.
- Control the Amount of Effect: The level of effect you apply significantly impacts the vocal sound. Too much reverb or delay can make it unclear, while too little can sound flat. Trust your ears and adjust until you find a good balance.
- Tweak Decay and Pre-Delay: The decay and pre-delay settings affect how the vocal sounds with the effect. Decay controls how long the effect lasts after the vocal stops, while pre-delay determines when the effect kicks in. TIP: I often use a large pre-delay on fast songs, sometimes up to 166ms.
- Think About the Setting: When selecting spatial effects, consider the song's vibe. A big reverb might suit a slow ballad well, while a shorter reverb could be better for an upbeat track.
- Use Panning: Panning vocal effects can also create space in your mix. Typically, reverbs and delays are stereo and panned hard left and right, but you can automate them to move around as well. Don’t hesitate to use a mono slap delay right up the center.
Pro Tip: "Other effects like vocal doubling, chorus, and phaser can add richness and character to your vocal mix."
8. Mix In Context
Mixing vocals in context means blending the vocals with the whole track, taking into account all the other instruments and sounds in the song. This is important because vocals are just one part of the overall sound, and how they fit with everything else can really affect their impact.
Here are some reasons why mixing vocals in context matters:
- Achieves a Balanced Mix: Mixing vocals in context helps them blend well with other elements. This is key for a balanced vocal mix. You can adjust the levels of other instruments to make sure they don’t overpower the vocals or get lost in the mix, leading to a more unified sound.
- Creates a Polished Sound: Mixing vocals in context allows you to tweak EQ and compression so they sound natural and refined within the whole mix.
- Enhances Emotional Impact: Vocals often carry the most emotion in a song. Mixing them in context can boost their emotional effect, creating a stronger experience for listeners by ensuring they are positioned well within the mix.
- Identifies and Fixes Issues: Mixing vocals in context helps spot any problems with them. By listening to the vocals along with the rest of the track, you can find areas that need fixing and address them accordingly.
Related Article: The 8 Best Vocal Plugins That Need To Be In Your Plugin Chain
Frequently Asked Questions (FAQs)
Why is mixing vocals crucial for high-quality music production?
Mixing vocals is essential because it makes sure that the vocal performance stands out in the mix, sounds professional, and adds emotional depth to the track. A properly mixed vocal can improve the overall quality of the music and make it ready for radio airplay.
What are some key vocal mixing techniques?
Key vocal mixing techniques include EQ (equalization), compression, pitch correction, automation, and spatial effects. Each technique plays a vital role in shaping the vocal sound and ensuring it fits well within the overall mix.
How can I improve recording quality for better vocal mixing?
To achieve great recording quality, focus on creating a solid foundation by using a pop filter to reduce sibilance and plosives, controlling breath noise, and ensuring clear audio without mouth clicks. High-quality recordings provide a better starting point for mixing.
What is a de-esser and how does it work?
A de-esser is a tool used in vocal mixing to reduce sibilance by detecting specific high-frequency sounds that are harsh or piercing. It works by lowering the volume of those frequencies, resulting in smoother vocals that fit better within the mix.
How do spatial effects like reverb and delay enhance vocals?
Spatial effects such as reverb and delay add depth and dimension to vocals. Reverb creates a sense of space and ambiance, while delay can introduce movement and rhythm. Choosing the right effect type based on music style is crucial to avoid muddy or artificial sounds.
What are some tips for achieving a balanced vocal mix?
To achieve a balanced vocal mix, it's important to mix vocals in context with other instruments. Fine-tune EQ settings, use compression appropriately, apply spatial effects judiciously, and adjust levels to ensure vocals are neither lost nor overpowering. This will help create a cohesive sound that highlights the vocal performance.
Final Thoughts
Mixing vocals is a key part in creating a high-quality song. It takes a mix of technical skills, creativity, and careful attention to detail to create a clean and professional vocal sound that enhances the emotions in the music.
By following the eight vocal mixing tips in this blog post, you can achieve a balanced mix that showcases the vocals and improves the overall sound of your tracks. Take your time, trust your ears, and try out different mixing techniques until you find what works best for each song.
With practice and dedication, you can become a master at mixing vocals and take your music to the next level.
“Some of the links within this article are affiliate links. These links are from various companies such as Amazon. This means if you click on any of these links and purchase the item or service, I will receive an affiliate commission. This is at no cost to you and the money gets invested back into Audio Sorcerer LLC.”