When it comes to capturing the perfect drum sound, one of the most crucial steps is mic placement. But how do you mic a drum kit effectively? In this comprehensive guide, we will explore the various components of a drum kit, the types of microphones suited for drums, and the best miking techniques for each drum. And for those looking to take their drum recordings to the next level, we will explore advanced techniques such as the Glyn Johns method and the Recorderman technique. These techniques offer unique approaches to drum miking and can help you achieve a more balanced and immersive drum sound. Whether you're a beginner or an experienced engineer, this guide will provide you with the knowledge and techniques to achieve professional drum recordings. Let's begin.
Understanding The Drum Kit Components
Before we dive into the world of drum miking, it's important to have a solid understanding of the different components that make up a drum kit. Each drum has its own unique sound and purpose, and knowing how they fit together will help you achieve the best possible drum recordings.
Kick Drum
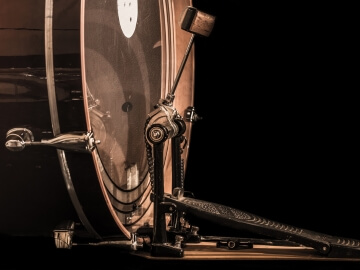
The kick drum, also known as the bass drum, is a crucial component of the drum kit. It is the largest drum in the set and is played using a foot pedal. The kick drum produces a deep, low-frequency sound that provides the foundation and pulse of the music.
The purpose of the kick drum is to create a strong and steady beat, driving the rhythm of the song. It adds power and impact to the overall drum sound, enhancing the groove and energy of the music. The kick drum is often used to emphasize the downbeat, creating a sense of anticipation and driving the song forward.
Snare Drum
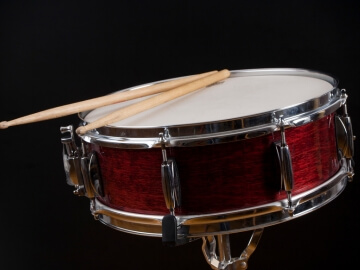
The snare drum is a fundamental component of the drum kit. It is a versatile drum that produces a sharp, cracking sound when struck. The snare drum is typically positioned between the drummer's legs and is played with drumsticks or brushes. The purpose of the snare drum is to provide the backbeat and accents in a song.
The distinctive sound of the snare drum is achieved by the presence of metal wires, called snares, stretched across the bottom head of the drum. When the top head is struck, the snares vibrate, creating a buzzing sound that is characteristic of the snare drum.
In addition to its role in providing the backbeat, the snare drum is also used for fills and solos. It can produce a wide range of sounds, from a tight and crisp crack to a deep and resonant tone, depending on the tuning and playing technique.
Toms
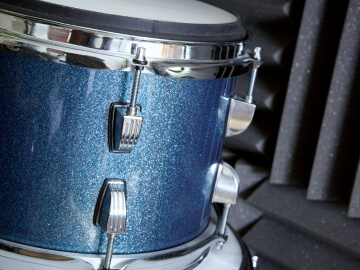
Toms are an essential component of the drum kit, adding depth and variety to the overall sound. These drums are cylindrical in shape and are usually positioned above the bass drum. Toms come in different sizes, with the larger ones producing lower pitches and the smaller ones producing higher pitches.
The purpose of toms is to provide fills, accents, and melodic elements in a drum performance. They are played with drumsticks and can create a range of tones depending on the tuning and playing technique. Toms are often used to add dynamics and excitement to drum beats, allowing drummers to create rhythmic patterns and add their own personal flair to a song.
Hi-Hat
The hi-hat is crucial in providing rhythm, texture, and dynamics to the overall sound. It consists of two cymbals, usually made of bronze, that are mounted on a stand and played with a pair of drumsticks or by using a foot pedal. The top cymbal is fixed, while the bottom cymbal is attached to a rod that allows it to move up and down.
The hi-hat is operated by a foot pedal, which controls the opening and closing of the cymbals. When the pedal is pressed down, the cymbals are closed tightly, producing a crisp and tight sound. When the pedal is released, the cymbals open up, creating a sustained and shimmering sound.
The hi-hat is primarily used to keep time and provide a steady beat in a drum performance.
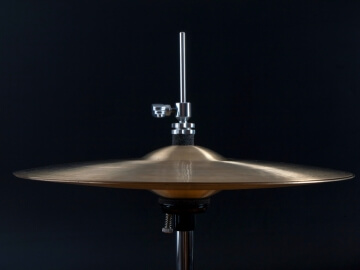
Cymbals

Cymbals are important in adding explosive elements, transitions, and new beginnings in a drum performance. These metal percussion instruments are typically made of bronze and come in various sizes and shapes. Cymbals are suspended on stands and are played by striking them with drumsticks or mallets.
The purpose of cymbals in the drum kit is multifaceted. They provide accents, crashes, and splashes that add dynamics and texture to the music. The different types of cymbals, such as ride, crash, and china that each have their own unique sound and function.
Ride cymbals are larger and produce a sustained, shimmering sound when struck with a drumstick. They are often used to maintain a steady rhythm and provide a smooth, continuous sound. Crash cymbals, on the other hand, are smaller and produce a loud, explosive sound when struck forcefully. They are used to create dramatic accents and emphasize certain beats or sections of a song. Lastly, China cymbals create a sound heard from eastern music such as countries within Asia. They are typically used in the same context as a crash cymbal.
Types Of Microphones Suited For Drum Kits
Dynamic Microphones
A dynamic microphone is a popular choice for recording drums due to its durability and ability to handle high sound pressure levels. These microphones are designed with a moving coil that generates an electrical signal when sound waves hit the diaphragm.
When it comes to recording drums, dynamic mics are particularly well-suited for capturing the low-end punch and attack of the kick drum. Their ability to handle high SPL makes them ideal for capturing the powerful and dynamic sound of the kick drum without distortion. Additionally, dynamic microphones are commonly used on snare drums and toms to capture their sharp and aggressive sound.
One popular dynamic mic for recording drums is the Shure SM57. Known for its versatility, the SM57 is often used on snare drums and toms as it provides excellent transient response. Another popular choice is the Audix D6, which is specifically designed for capturing the deep and punchy sound of the kick drum.
Condenser Microphones
A condenser microphone is another type of microphone commonly used for recording drums. Unlike dynamic microphones, condenser microphones use a thin diaphragm that vibrates in response to sound waves, creating an electrical signal. These microphones are known for their sensitivity and ability to capture detailed and nuanced sound.
While condenser microphones are not typically the first choice for miking drums, they can be useful in certain situations. They excel at capturing the high-frequency details and subtle nuances of cymbals, making them a great choice for overhead miking. Condenser microphones can also be used on hi-hats and ride cymbals to capture their delicate tones.
One popular condenser microphone for recording drums is the Neumann KM 184. Known for its versatility and transparent sound, the KM 184 is often used as an overhead microphone to capture the overall drum kit sound. Another popular choice is the AKG C414, which offers multiple polar patterns and can be used for various drum miking techniques.
Miking Techniques For Each Drum
When it comes to miking a drum kit, it's important to consider the specific techniques for each drum. Each drum in the kit plays a unique role in creating the overall sound, and capturing their individual characteristics is crucial for a balanced and professional drum mix.
Kick Drum
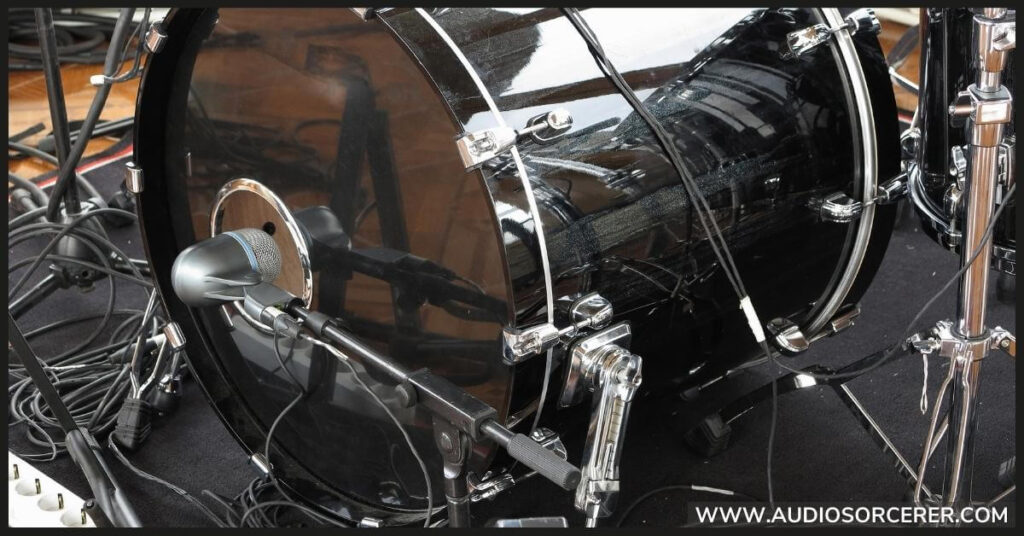
Place a mic outside the kick drum right up to the sound hole but not inside. If there isn't a sound hole you can place it in the center at the height of where the beater hits on the other side. You can also place a mic inside the drum if there is a hole opening. This allows more low-end to picked up and more options during the mixing process. We recommend either the AKG D112 or the Shure Beta 52a for a bass drum mic.
Snare Drum
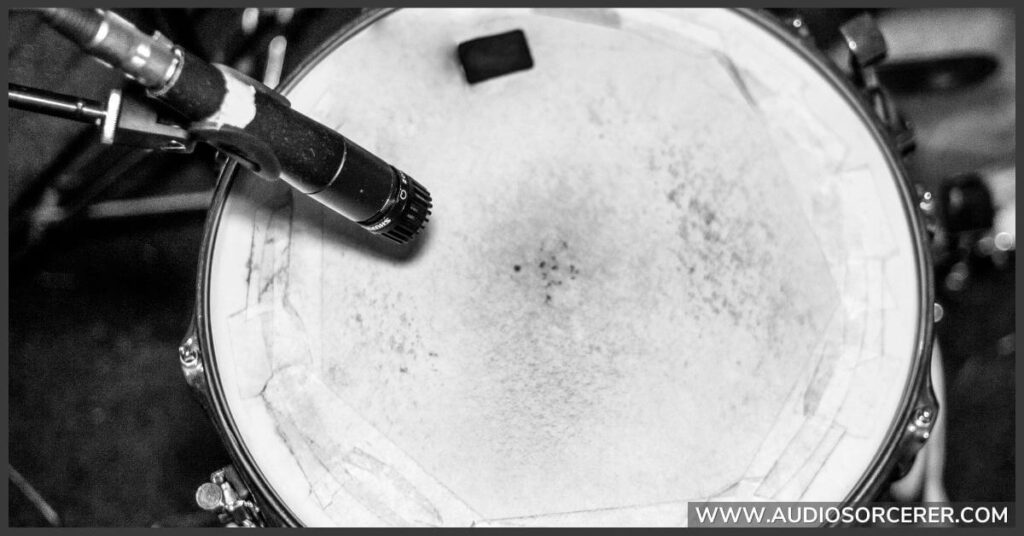
Place the mic above the rim and pointing towards the center of the drumhead. This captures the snare's crack and sensitivity. We recommend the Shure SM57.
Toms
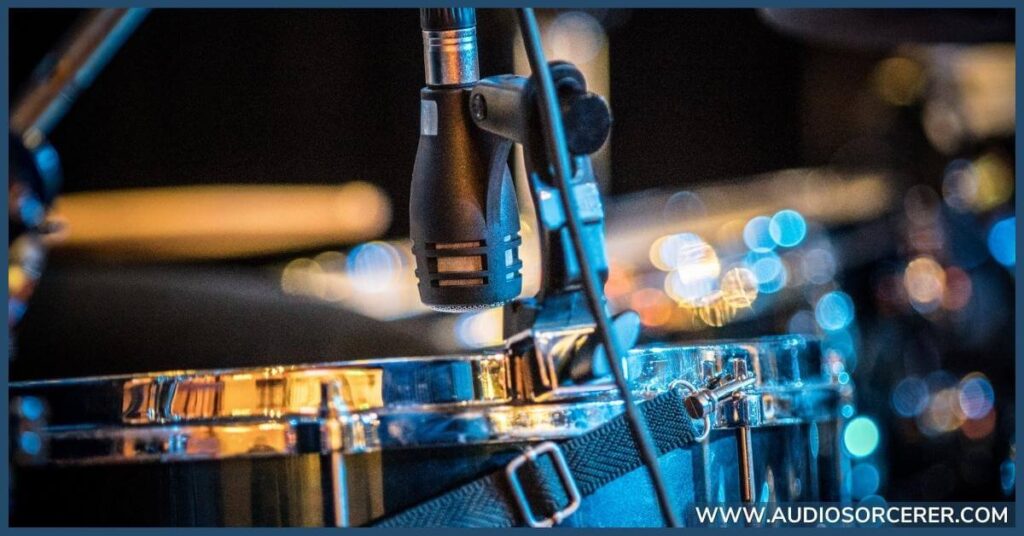
Position the microphones just above the rim, angled towards the center of each drum. This captures the full range of the toms' tones and resonance. We love the Sennheiser MD 421.
Hi-Hat
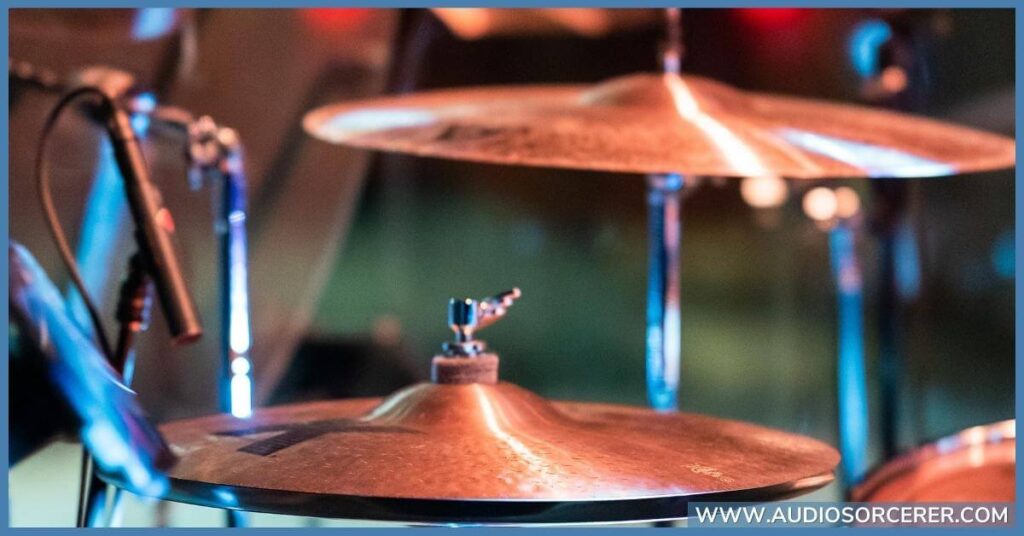
Place a small diaphragm condenser microphone just above the hi-hat, angled towards the center, to capture its subtle nuances. We like the Neumann KM 184.
Cymbals
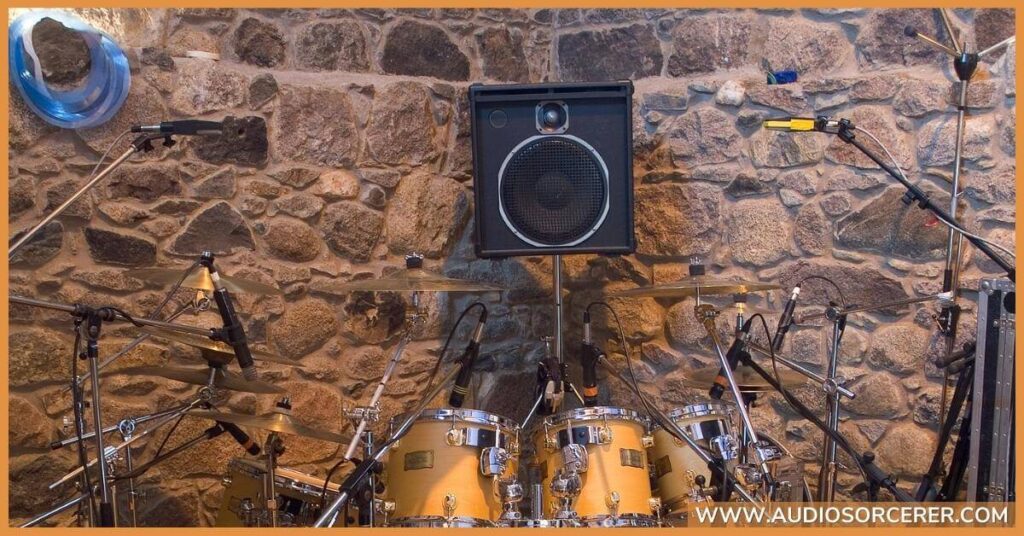
These can be dynamic or condenser microphones, placed above the kit to capture the overall sound and shimmer of the cymbals. One mic should be placed on each side of the kit. There is no specific height to place them at so it's worth experimenting. We recommend a pair of the Neumann KM 184s for overhead mics.
Related Article: The Top 5 Best Drum Mic Kits Of 2024
The Importance Of Room Miking
In addition to miking each individual drum in a kit, using a room microphone is crucial for capturing the overall sound and ambience of the drum kit. A room mic is typically placed a few feet away from the kit, capturing the natural reverb and resonance of the room.
The room mic plays a significant role in creating a sense of space and depth in the drum mix. It adds a sense of realism and can make the drums sound larger and more immersive. By blending the room mic with the close mics on each drum, you can achieve a balanced and cohesive drum sound that fills the mix.
When using a room mic, it's important to consider the placement and positioning. Experiment with different distances and angles to find the sweet spot that captures the desired sound. Keep in mind that the room itself will have a significant impact on the sound, so it's worth exploring different recording spaces to find the one that complements the drum kit and the desired sound.
During the mixing process, you can adjust the level and EQ of the room mic to achieve the desired balance between the close mics and the room sound. This allows you to control the amount of ambience and space in the drum mix, depending on the style and genre of music.
Tips For Reducing Phase Issues
When recording a drum kit, phase issues can be a common challenge that affects the overall sound quality. Phase occurs when two or more microphones pick up the same sound source at slightly different times, resulting in cancellation or reinforcement of certain frequencies. This can lead to a thin or hollow sound and lack of clarity.
To reduce phase issues when miking a drum kit, there are several tips you can follow. First, pay attention to mic placement. Ensure that the distance between the microphones is consistent and that they are equidistant from the sound source. This helps to minimize phase cancellation.
Second, experiment with different polar patterns. Dynamic microphones are typically less sensitive to phase issues compared to condenser microphones. However, if you're using condenser mics, try using cardioid or hypercardioid patterns to reduce the chances of phase cancellation.
Third, consider using phase alignment tools during the mixing process. These tools can help you adjust the timing of the recorded tracks to ensure they are in phase with each other.
Lastly, be mindful of the room acoustics. Excessive reflections and reverberation can exacerbate phase issues. Use acoustic treatment to minimize unwanted reflections and create a more controlled recording environment.
By implementing these tips, you can significantly reduce phase issues when recording a drum kit, resulting in a more balanced and professional sound.
Related Article: What Is Phase Cancellation? Don’t Let It Ruin Your Recordings!
Advanced Techniques
In addition to the basic miking techniques discussed earlier, there are several advanced techniques that can take your drum recordings to the next level. Let's check them out!
The Glyn Johns Method
The Glyn Johns method is a popular drum miking technique that has been used by many engineers and producers to capture a balanced and natural drum sound. This technique involves using a minimal number of microphones to capture the entire drum kit.
The Glyn Johns method typically uses three microphones: one overhead microphone positioned above the drummer's head, one microphone placed near the kick drum, and another microphone placed between the snare drum and the hi-hat. The overhead microphone captures the overall sound of the kit, while the kick drum and snare drum microphones provide additional punch and clarity to those specific elements.
One of the advantages of the Glyn Johns method is its simplicity. With just three microphones, you can achieve a well-balanced drum sound without the need for multiple microphones and complex setups. This makes it a great option for home studios or live recordings where you may have limited resources or time.
Another benefit of the Glyn Johns method is its ability to minimize phase issues. By carefully positioning the microphones and adjusting their distances from the drums, you can reduce phase cancellation and achieve a more coherent and focused drum sound.
Overall, the Glyn Johns method is a versatile and effective drum miking technique that can produce professional results with minimal equipment. It's worth experimenting with this technique to see if it suits your recording needs and preferences.
The Recorderman Technique
The Recorderman technique is another popular drum miking technique that is widely used in the recording industry. This technique involves using two overhead microphones to capture the drum kit's sound in a balanced and natural way.
To set up the Recorderman technique, you will need two identical microphones. The first microphone is positioned directly above the drummer's head, about 3 feet away from the snare drum. The second microphone is placed slightly behind the drummer, also about 3 feet away from the snare drum. Both microphones should be at the same height and angle.
The Recorderman technique offers several advantages. Firstly, it provides a wide stereo image of the drum kit, capturing the nuances and details of each drum and cymbal. This technique also offers excellent phase coherence, resulting in a focused and punchy drum sound.
Another benefit of the Recorderman technique is its ability to minimize room reflections and bleed from other instruments. By positioning the microphones close to the drums and angling them away from the room, you can achieve a more isolated drum sound.
The Recorderman technique is particularly useful in situations where you want a natural and balanced drum sound without excessive room ambience. It is a versatile technique that can be used in various recording environments and genres.
Experimenting with different microphone placements and distances can help you fine-tune the sound to your liking. Overall, the Recorderman technique is a valuable tool for capturing the full character and dynamics of a drum kit in a recording.
Triggers And Samples
Triggers and samples are powerful tools that can enhance the sound of a drum kit in both live performances and studio recordings. Triggers are electronic devices that are attached to the drum heads and detect the impact of the drumstick. When triggered, they send a signal to a sound module or sampler, which then plays a pre-recorded sample of a drum sound. This allows drummers to achieve consistent and controlled drum sounds, regardless of their playing dynamics.
Using triggers and samples can be particularly useful in situations where the drum kit needs to be amplified or mixed with other instruments. By blending the natural drum sound with triggered samples, you can create a larger and more impactful drum sound that cuts through the mix.
Samples, on the other hand, are pre-recorded drum sounds that can be triggered by a sound module or sampler. These samples can be recordings of real drums or synthesized drum sounds. They offer a wide range of options in terms of drum sounds, allowing drummers and engineers to experiment with different tones and textures.
When using triggers and samples, it's important to find the right balance between the natural drum sound and the triggered samples. The goal is to enhance the drum sound without making it sound artificial or unnatural. Experimenting with different trigger settings and sample libraries can help you achieve the desired result.
Frequently Asked Questions (FAQs)
How many mics do you need to mic a drum kit?
To achieve a balanced and professional sound when miking a drum kit, it is recommended to use multiple microphones. The number of mics you need will depend on the size of the drum kit and the level of detail you want to capture. 7 Mics is ideal for a standard kit.
Can I record drums with one mic?
While it is possible to record drums with just one microphone, it may not provide the desired level of detail and balance in the sound. Using a single mic will capture an overall sound of the drum kit, but it won't be able to capture the individual nuances and dynamics of each drum and cymbal.
How do I reduce bleed between mics?
To reduce bleed between mics when recording a drum kit, there are a few techniques you can employ. One effective method is to use isolation shields or gobos to physically separate the microphones. These shields can be placed strategically between the drums and cymbals to minimize the sound bleed.
Additionally, using directional microphones with tight polar patterns can help to isolate the sound source and reduce bleed. Positioning the microphones close to the drums and angling them away from other instruments can also help to minimize bleed.
Another technique is to use noise gates on each individual microphone channel. This allows you to set a threshold level below which the microphone will not pick up any sound, effectively reducing bleed.
Does the room matter when recording drums?
When it comes to recording drums, the room you choose can have a significant impact on the overall sound quality. The acoustics of the room can either enhance or detract from the natural sound of the drums. A room with good acoustics can add depth and resonance to the drum sound, while a room with poor acoustics can result in a muddy or boxy sound.
What do I plug my drum mics into?
When it comes to plugging in your drum mics, you have a few options. The most common method is to connect your mics to a mixing console or audio interface. These devices allow you to control the levels and EQ of each microphone, and they provide a way to route the audio to your recording software or PA system.
Another option is to use a dedicated drum mic preamp. These preamps are specifically designed to amplify the signal from drum mics and provide a clean, transparent sound. They often have multiple inputs and outputs, allowing you to connect multiple mics and route the audio to different destinations.
If you're using a digital drum module or electronic drum kit, you may be able to connect your mics directly to the module or kit. This can simplify your setup and eliminate the need for additional equipment.
Final Thoughts
In conclusion, properly miking a drum kit is essential for achieving a professional and balanced drum sound. By understanding the components of the drum kit and the different types of microphones suited for each drum, you can capture the true essence of the instrument. Whether you choose dynamic microphones for their durability and ability to handle high sound pressure levels, or condenser microphones for their sensitivity and detailed sound reproduction, the key is to experiment and find the best combination for your desired sound.
Miking techniques such as close miking, overhead miking, and room miking all play a crucial role in capturing the nuances and dynamics of the drum kit. Additionally, techniques like the Glyn Johns method and the Recorderman technique offer unique perspectives and stereo imaging options.
It's important to address phase issues and reduce bleed between mics to ensure a clean and well-defined drum sound. Proper mic placement, using isolation techniques, and utilizing tools like gates and high-pass filters can help minimize these issues.
Lastly, don't underestimate the importance of the room when recording drums. The acoustics of the space can greatly impact the overall sound, so consider using room mics to capture the natural ambience and depth of the drums.
If you found this information helpful, please consider subscribing to our blog for more music production tips, tricks, and guides. Also, you can support new content by contributing to our tip jar.
"Some of the links within this article are affiliate links. These links are from various companies such as Amazon. This means if you click on any of these links and purchase the item or service, I will receive an affiliate commission. This is at no cost to you and the money gets invested back into Audio Sorcerer LLC."